Personal Wiki
This guide covers installing Bookstack as an LXC container on Proxmox using TTeck's Ubuntu script. SSH into the new Ubuntu machine and run the Bookstack install script from my GitHub. Enter a domain or IP for the Bookstack instance. Change the default login credentials upon setup completion


As I was building my home lab it became apparent that I would need to keep a wiki of sorts. That is why I installed Bookstacks
This guide will cover the installation of Bookstacks as an LXC container. We are going to use a TTeck helper script to install Ubuntu first and then install bookstacks.
Ubuntu
On your Proxmox instance select your main server and select shell
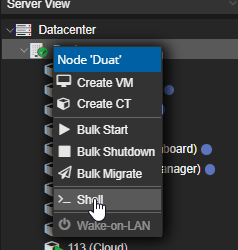
Once logged in we are going to use the TTeck helper script to install Ubuntu. You can use the default install options and just let it run.
bash -c "$(wget -qLO - https://github.com/tteck/Proxmox/raw/main/ct/ubuntu.sh)"
Bookstacks Installation
Once installed ssh or open the console for the newly created Ubuntu machine. I have a script on my Github that will do all the heavy lifting for us. RUN THIS ON THE UBUNTU MACHINE NOT THE MAIN SERVER
bash -c "$(wget -qLO - https://raw.githubusercontent.com/Gereshk/Scripts-homelab/main/bookstack/bookstack.sh)"
Once run the script will ask you for a domain or IP you want to host the bookstack instance. I use the IP as I can use a proxy to route the traffic if I want to use domain names.
This will take a second but once complete you will see this information block

We can head over to that IP address and use the default credentials to login. This will not prompt you to change them but I Highly Recommend you do.
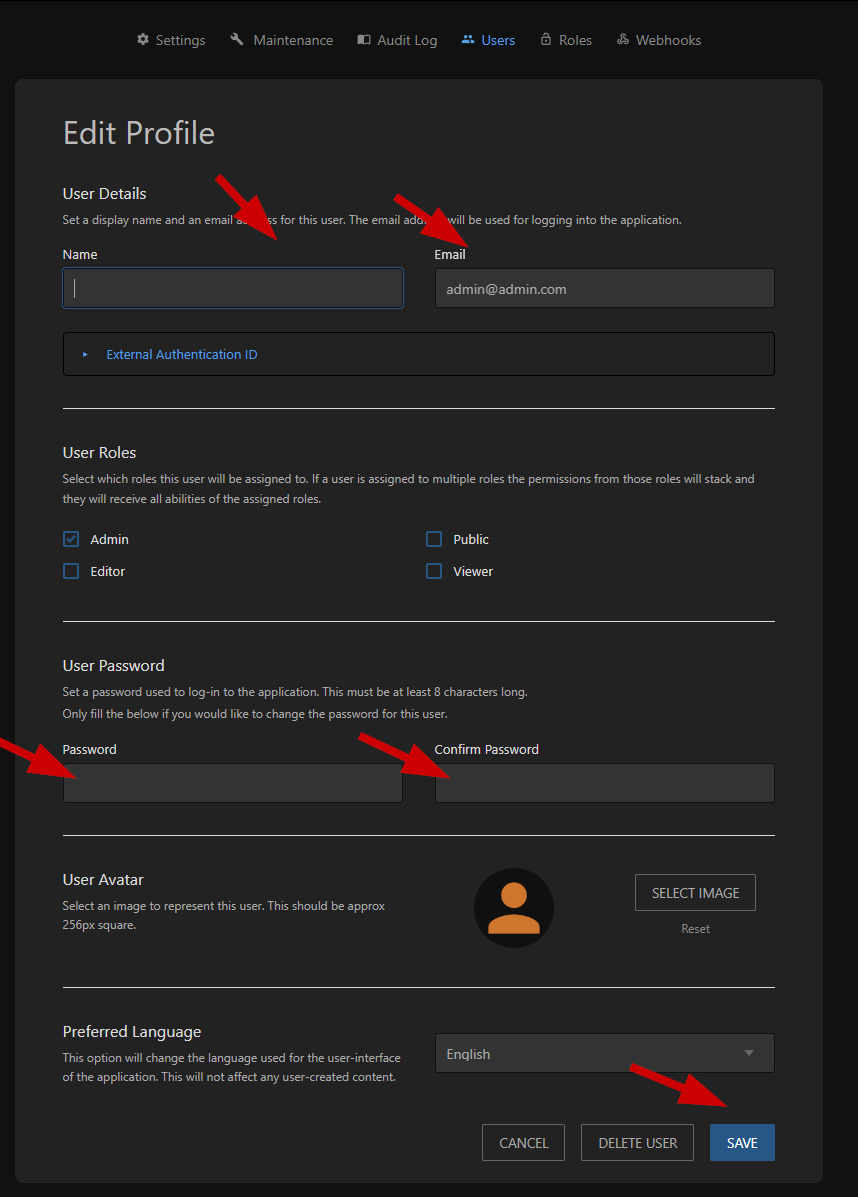
Change password
Click on settings > users > admin. I would recommend changing the email. Then Input the new password twice and click save.
There is a lot more to configure in Bookstacks but most of it is a matter of personal preference so I will leave it here. If you have a question on how to do something let me know and I will work on getting you an answer.