Let's Block Some Ads
Now that Pi-hole is all set up, we can log in, but we're still not using it. Block Lists block over 150,000 domains by default, which I increased to over half a million with The Firebog lists, opting for the green-coded ones for minimal browsing interference.


If you followed my post on installing Pi-hole I am glad you continued to the configuration portion. If you found this from a google search WELCOME!!.
Now that Pi-hole is all set up and we can log in we still are not using it.
Block Lists
There are over 150,000 domains that will be blocked by default with a base install of PI-hole. While that will do a decent job I opted to increase that number to over half a million. The easiest way to do that is with The Firebog lists. These lists are list of domains that have been confirmed to serve ads as well as some whitelists that are recommended. They are color coded and I opted to go for the ones in Green as the are the least likely to interfere with browsing.
Adding a list
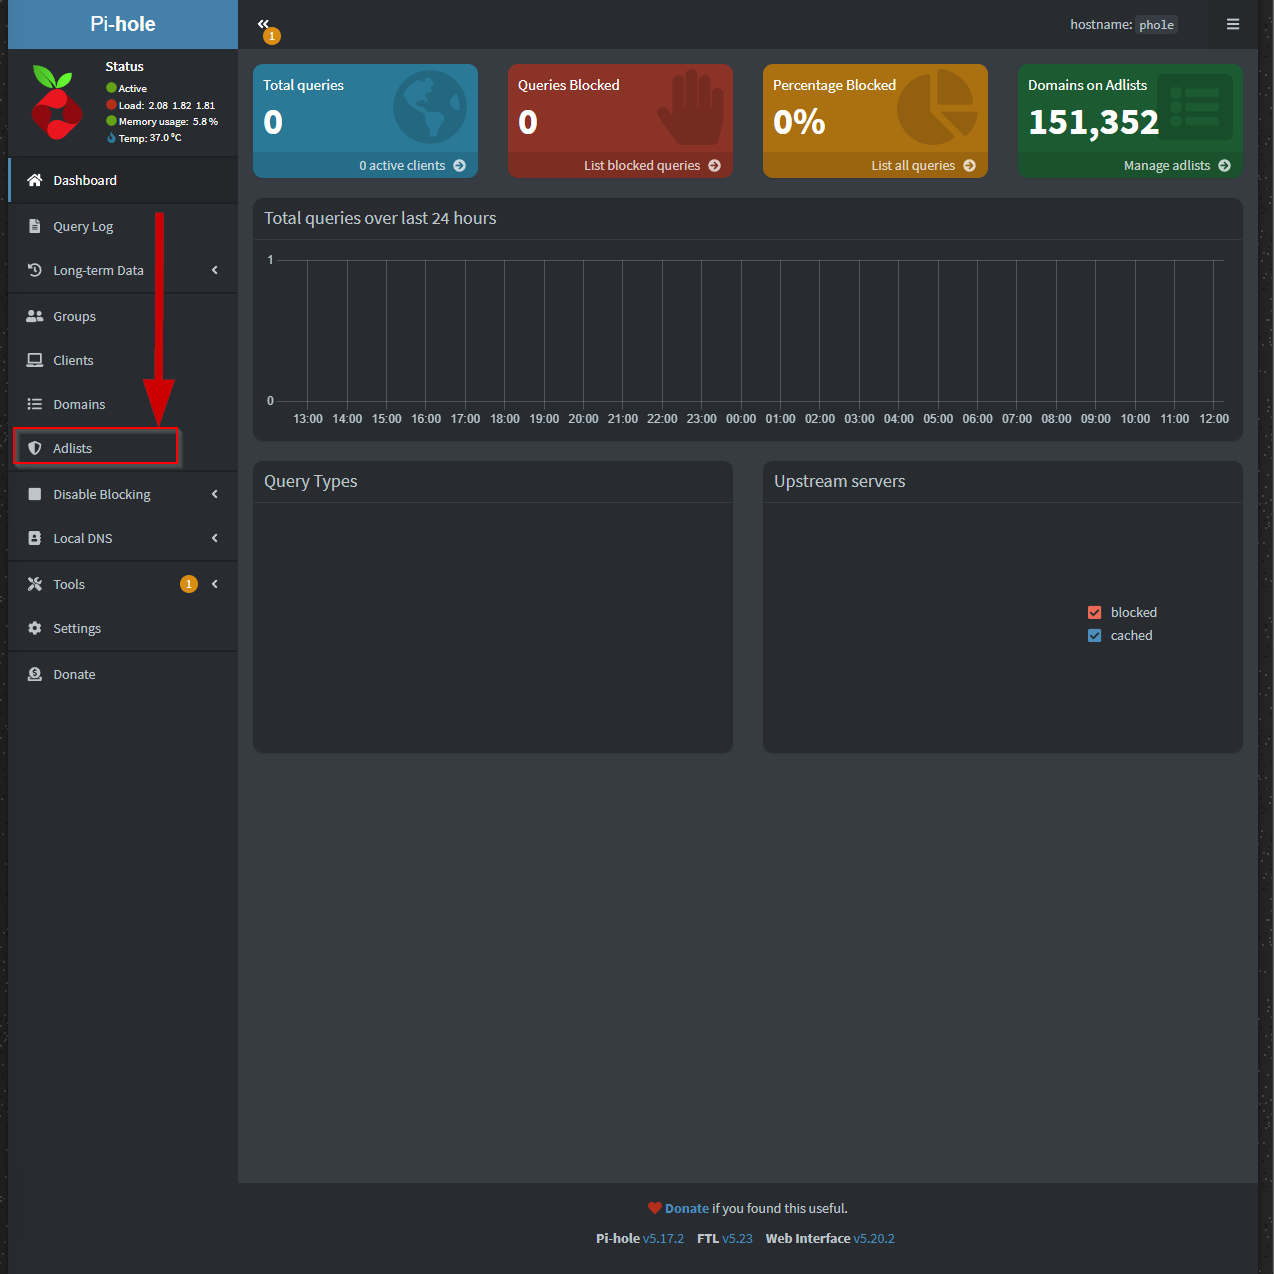
First we need to head over to the adlists from the dashboard
Now we copy and paste the links from Firebog into the address space, add an optional comment and then clicking add
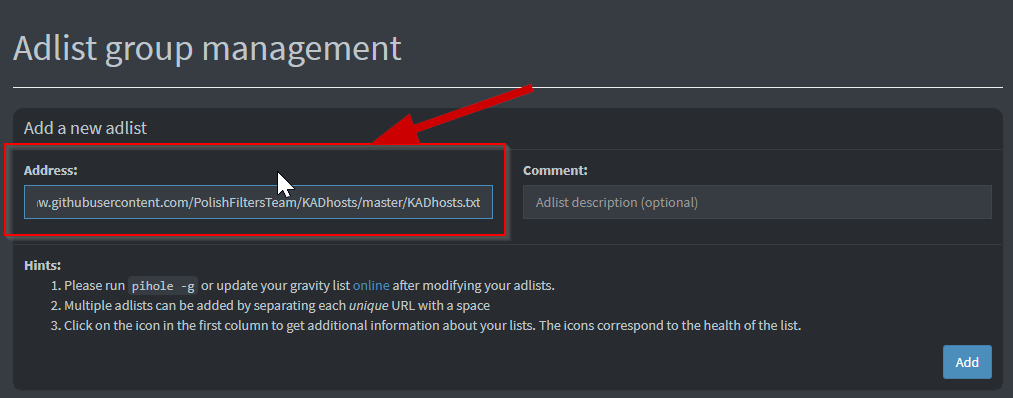
To make this easier I chose to do each list separately so that I could add comments to it for tracking later. If you do not want to add each URL separately you can separate them by a space and upload as many as you want at a time.
Update Gravity
After all the lists you wish are updated we need to update them so that they actually get pulled down you can do this two ways. 1. Through your console to Pi-hole run this command.
pihole -gor by using the GUI by clicking on tools>>Update Gravity>>Update

Once they are all the green lists from Firebog are added you will have over half a million sites that will significantly cut down the ads you get served up. But we still are not using it.

Unbound
Unbound is a secure open-source recursive DNS server primarily developed by NLnet Labs, VeriSign Inc., Nominet, and Kirei. This eliminates the need to go to third party DNS servers by going direct to the source, in doing so there is less chance of error, malicious intent, or someone reporting your “request” to someone else.
Install
To install it we will use apt using the commands below
if you haven't updated
sudo apt update && sudo apt upgrade -yThen to install unboud
sudo apt install unbound -y
Configure Unbound
Now that it is installed we have to add some configuration to it. I have copied these configurations directly from the Pi-hole documentation. First we need to create a config file and add a configuration to it
sudo nano /etc/unbound/unbound.conf.d/pi-hole.confThen just copy and paste this config into it
server:
    # If no logfile is specified, syslog is used
    # logfile: "/var/log/unbound/unbound.log"
    verbosity: 0

    interface: 127.0.0.1
    port: 5335
    do-ip4: yes
    do-udp: yes
    do-tcp: yes

    # May be set to yes if you have IPv6 connectivity
    do-ip6: no

    # You want to leave this to no unless you have *native* IPv6. With 6to4 and
    # Terredo tunnels your web browser should favor IPv4 for the same reasons
    prefer-ip6: no

    # Use this only when you downloaded the list of primary root servers!
    # If you use the default dns-root-data package, unbound will find it automatically
    #root-hints: "/var/lib/unbound/root.hints"

    # Trust glue only if it is within the server's authority
    harden-glue: yes

    # Require DNSSEC data for trust-anchored zones, if such data is absent, the zone becomes BOGUS
    harden-dnssec-stripped: yes

    # Don't use Capitalization randomization as it known to cause DNSSEC issues sometimes
    # see https://discourse.pi-hole.net/t/unbound-stubby-or-dnscrypt-proxy/9378 for further details
    use-caps-for-id: no

    # Reduce EDNS reassembly buffer size.
    # IP fragmentation is unreliable on the Internet today, and can cause
    # transmission failures when large DNS messages are sent via UDP. Even
    # when fragmentation does work, it may not be secure; it is theoretically
    # possible to spoof parts of a fragmented DNS message, without easy
    # detection at the receiving end. Recently, there was an excellent study
    # >>> Defragmenting DNS - Determining the optimal maximum UDP response size for DNS <<<
    # by Axel Koolhaas, and Tjeerd Slokker (https://indico.dns-oarc.net/event/36/contributions/776/)
    # in collaboration with NLnet Labs explored DNS using real world data from the
    # the RIPE Atlas probes and the researchers suggested different values for
    # IPv4 and IPv6 and in different scenarios. They advise that servers should
    # be configured to limit DNS messages sent over UDP to a size that will not
    # trigger fragmentation on typical network links. DNS servers can switch
    # from UDP to TCP when a DNS response is too big to fit in this limited
    # buffer size. This value has also been suggested in DNS Flag Day 2020.
    edns-buffer-size: 1232

    # Perform prefetching of close to expired message cache entries
    # This only applies to domains that have been frequently queried
    prefetch: yes

    # One thread should be sufficient, can be increased on beefy machines. In reality for most users running on small networks or on a single machine, it should be unnecessary to seek performance enhancement by increasing num-threads above 1.
    num-threads: 1

    # Ensure kernel buffer is large enough to not lose messages in traffic spikes
    so-rcvbuf: 1m

    # Ensure privacy of local IP ranges
    private-address: 192.168.0.0/16
    private-address: 169.254.0.0/16
    private-address: 172.16.0.0/12
    private-address: 10.0.0.0/8
    private-address: fd00::/8
    private-address: fe80::/10
Pay attention to this line so we can set up the Pi-hole side of things
    interface: 127.0.0.1
    port: 5335
Unbound is a service and now that it has a config we need to start it. From this point on Unbound will start automatically
sudo systemctl restart unboundUnbound in Pi-hole
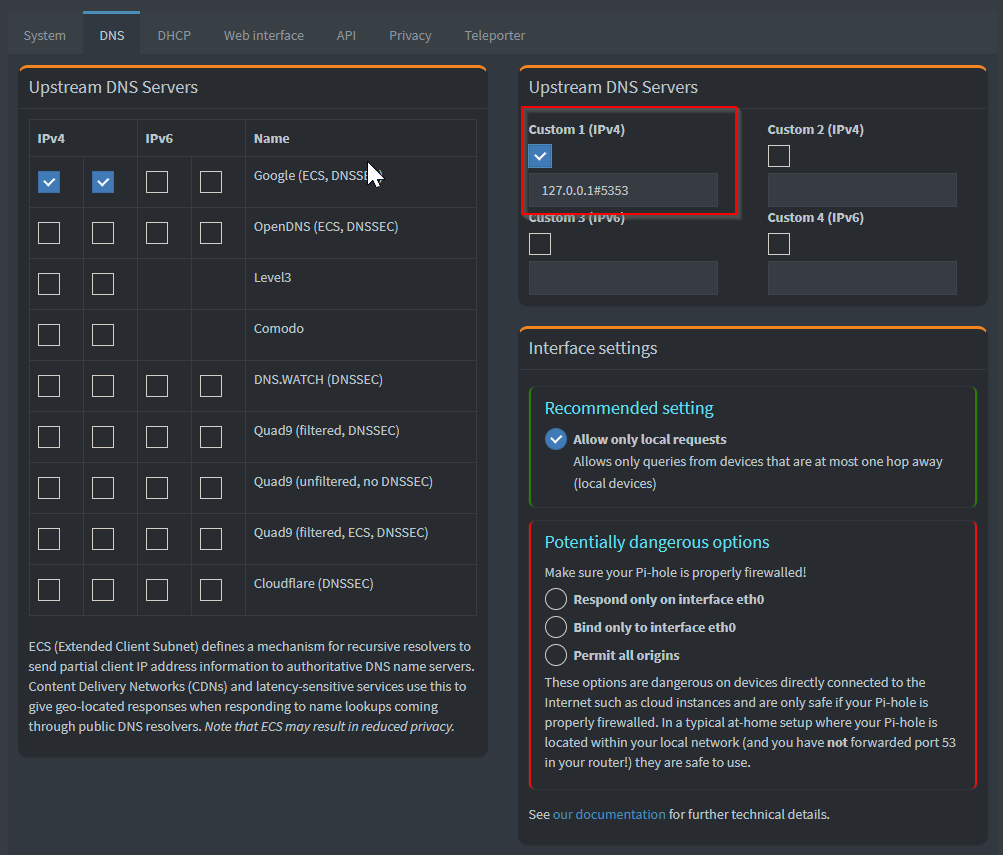
The final step is to configure the upstream DNS servers for Pi-hole. This is done in the GUI of Pi-hole by going to settings>>DNS and entering a custom upstream DNS server to be our unbound service which is 127.0.0.1#5353
Testing
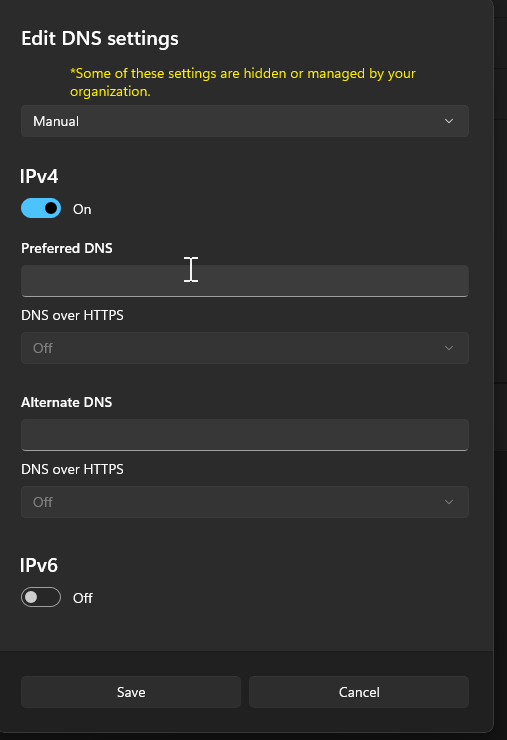
I would recommend testing the configuration out on a single device first before adding it to your whole network config. Let's do that now in Windows.
In Windows settings go to network & internet select Ethernet and click edit on DNS server assignment. Switch the drop down to manual and toggle on IPv4.
Then enter the IP address of your Pi-hole Instance.
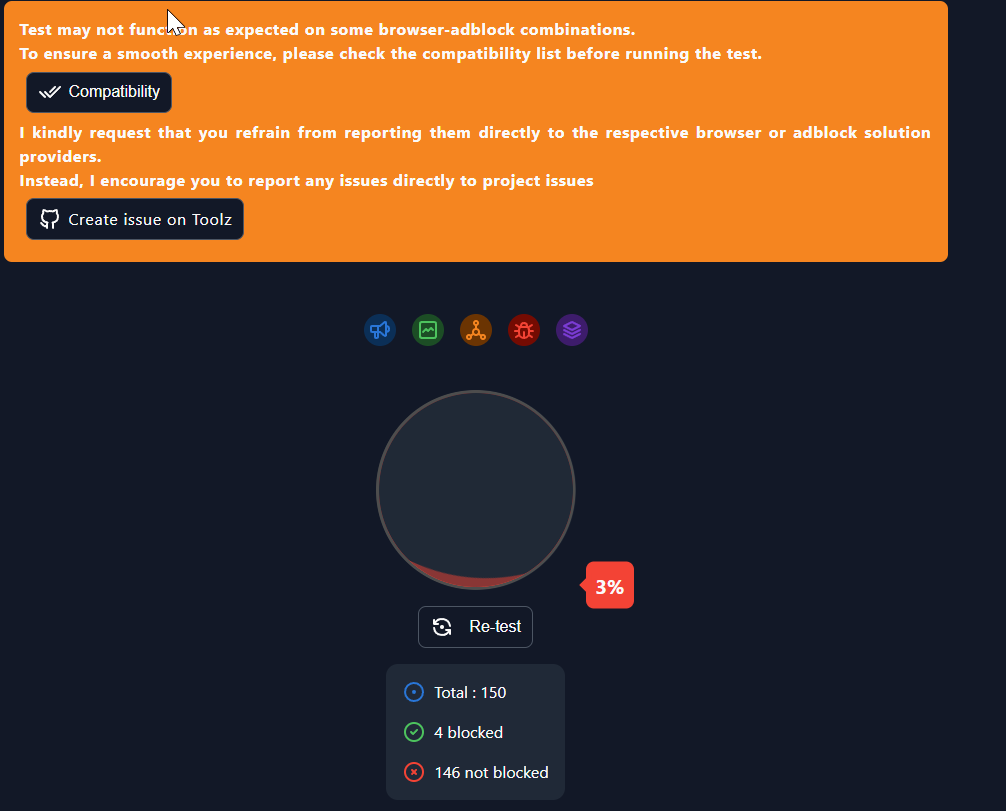
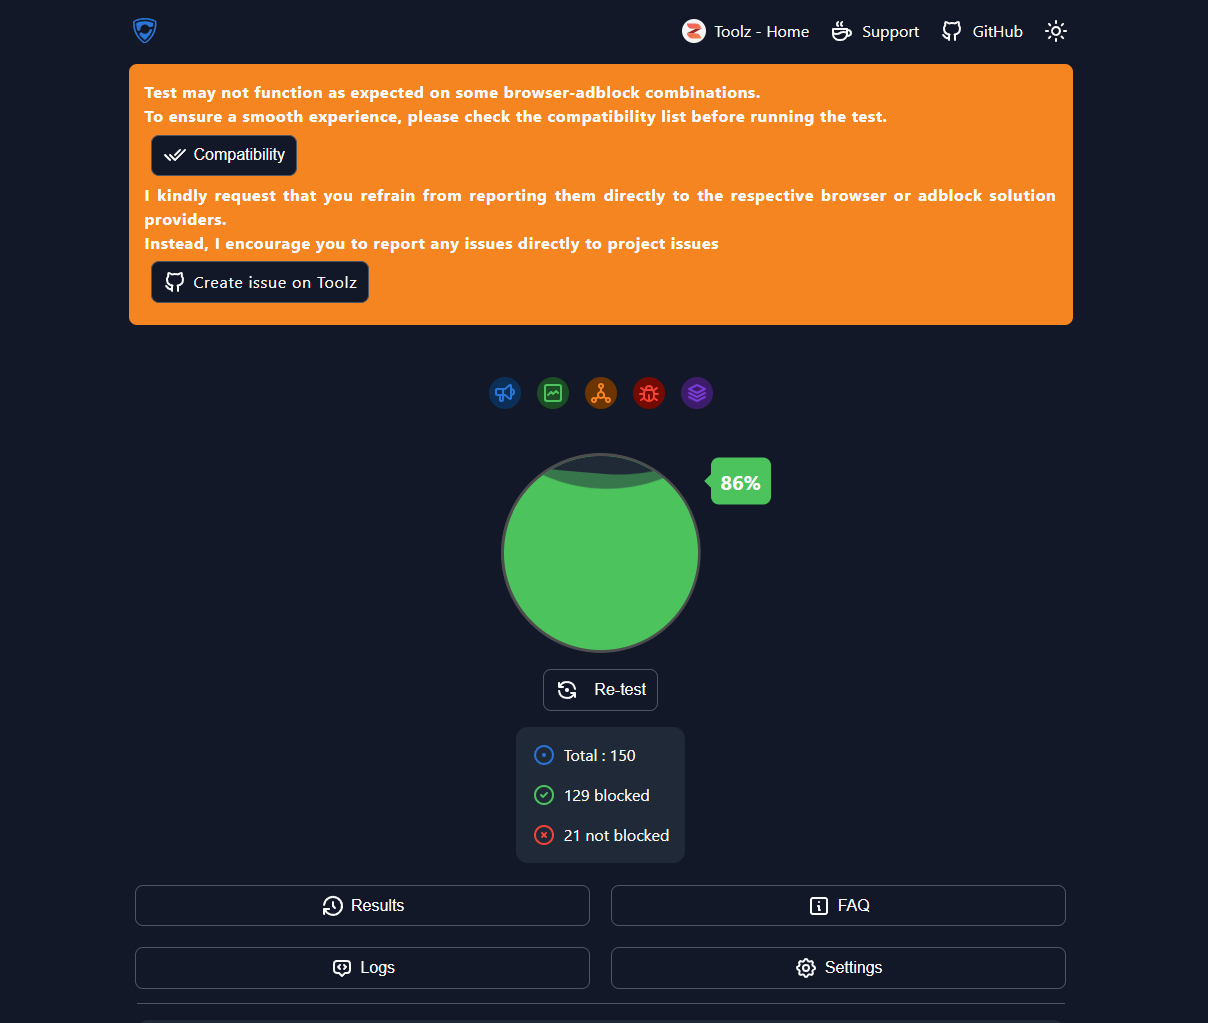
To actually see if ads are being blocked I like to use d3ward's ad blocker tool found here. It runs automatically when you load the page and gives you a great idea of what is being blocked.
Before Pi-hole
After Pi-hole
Once that is complete you can revert the changes you made on the Windows test machine and add the DNS configuration to your network, Or only use it for certain machines in your home.